no sew WAITING bag tutorial + sewn bag tutorial
Have I mentioned that my kids are really active? When they have wide open space to roam life with them is a blast, but squeeze them into a little waiting room or plop them into a cramped booth and suddenly keeping them occupied is a must. Big M is no longer interested in tic-tac-toe and if there isn’t someone close by to listen to Little M sing, waiting is no fun at all.
In pure desperation I decided to make myself a WAITING BAG. Small enough to fit in my purse or the glove box of my car so that the bag is really easy to keep close by. It holds 4 fun, creative, open-ended activities that make waiting a breeze.
no sew WAITING BAG
what you need: felt ~ hot glue gun ~ scissors ~ string ~ embroidery thread (optional) ~ embroidery needle (optional)
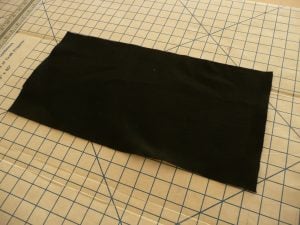
I started by measuring the fabric against the largest item I planned to use. (More on the notebook tomorrow!) I decided to cut the fabric 9″ x 18″.
I applied hot glue to the very edge of the felt. Then folded the fabric in 1 inch and pressed the glue into place. (You want to leave room to pull the string through.)
I folded the felt in half (right sides together) to make a 9 inch square. I hot glued the edges on both sides, making sure to cover the entire length of the side.
I used a safety pin to guide the sting through both sides. (I used cording but any string or ribbon would work.)
Then I simply flipped the bag and ta da. Easy peasy no sew bag!

sewn WAITING BAG
what you need: felt ~ scissors ~ sewing machine ~ straight pins ~ string ~ embroidery thread (optional) ~ embroidery needle (optional)
I measured, and cut a felt rectangle 9″ x 18″.
I folded the short side in 1 inch and pinned it on the edge. Then I did the same on the other side. I sewed a straight line about 1/8″ in from the edge of the felt. (Make sure the space is big enough to fit the string through.)
I hand stitched this embellishment on a separate piece of felt. Then I simply sewed it onto the bag. I folded the felt so I could see just where I would want it.
I used a safety pin to guide the sting through both sides. (I used cording but any string or ribbon would work.) Once the string was in place I sewed up the side that DID NOT have the tie. (Make sure the string is even because once you sew over it, it won’t move.) On the side with the ties I sewed up just until I reached the base of the string hole.
If you love this post, click one of these cute little buttons and follow me!


Fave waiting game – my kids call it the back scratcher, I’m sure everyone has a version of it. You draw out a shape, letter or word on the child’s back with your finger and they have to guess it. Keeps my monkeys amused for ages… 🙂
The bags are beautifully made. It is simple also, perfect for everyday use. Thanks for sharing this as your piece. Cool thing!
Thank you! I had a lot of fun making them.